This is the audio image that I submit to my lecturer.
(click the words below)
Everyday Life
Saturday, 2 November 2013
Second tutorial
In this second tutorial, we learn how to make the button react by clicking on the button by making the image stop when reach certain point and then will change to another image when click on the button.
Click HERE to go to the link for this tutorial.
Click HERE to go to the link for this tutorial.
Auditory Imaging
For our first assignment, we are required to create an "Auditory Imaging", which we have to create an audio image using sound effect. He also give 8 themes to work on it, the 8 themes are:
1) Wild Life
2) Everyday Life
3) War Elements
4) Sports Elements
5) Industry and Electronic sound
6) Weather
7) Cities
8) Market
So, I choose Everyday Life as my theme. Before starting on the assignment, I start with writing out the sequence for auditory imaging, so that it makes me easier to find the sound effect that I wanted to use. This is the sequence for auditory imaging:
Every day life-going back home after
working
- Going back home on peak time, traffic
jam
= horn sound to each other
=
sigh
- take out key
- open and close the door
- put down bag
- bathing
- cook dinner
= when cooking, the pan suddenly on fire
= man scream
= grab water putting out fire
= finally put out fire
= panting
- give up on cooking dinner
= brush teeth
= go to bed
Assignment 1
This is the submission for our first assignment for 3D Animation. The first assignment is jumping animation.
Perspective View
Side View:
First class for Sonic Design
This is the first sonic design course for this semester. Without wasting any time, our lecturer which is the same as the lecturer for game design, Mr Razif Mohamed, start the lesson on how to adjust the equalizer for sonic. After learning, we are require to do a homework about adjusting the equalizer of a conversation to a voice which speak through telephone, from wardrobe and walkie talkie.
So, these are the voice that I have adjust the equalizer (Just click on the word below, and it will lead to another link):
1) Telephone
2) Walkie Talkie
3) Wardrobe
So, these are the voice that I have adjust the equalizer (Just click on the word below, and it will lead to another link):
1) Telephone
2) Walkie Talkie
3) Wardrobe
First class for Usability and Mobile Application
For this subject, we will be learning how to make a phone apps, and how to transfer into a smart phone.
For the first lesson, our lecturer had taught us on how to make a responsive web.
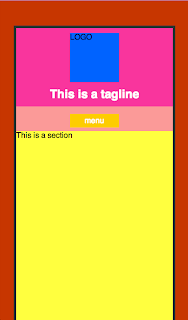
This is another responsive web for out tutorial.
For the first lesson, our lecturer had taught us on how to make a responsive web.
This is the responsive web that I have done for our tutorial.
This is another responsive web for out tutorial.
First Class for Game Design
This is the first class with our new lecturer, Mr Razif Mohamed. In this first class of game design, we learn the basic shape tweening using Adobe Flash.
So this is the video for shape tweening.
After learning the basic shape tweening, he gave us a homework to revise back what he have taught us. He require us to use 10 pictures to make it move and tweening in the way that we want. So this is the homework.
So this is the video for shape tweening.
After learning the basic shape tweening, he gave us a homework to revise back what he have taught us. He require us to use 10 pictures to make it move and tweening in the way that we want. So this is the homework.
First elective class of 3D Animation
In semester 3, I choose 3D Animation as my elective subject. On the first day of the class, our lecturer Mr Ng Kim Boon show us the module outline and told us about the assignment.
We will have 4 assignments for this semester, and the 4 assignments are:
1) Jumping
2) Walk Cycle
3) Walking point A to point B
4) Lip Sync
But before start doing on the jumping, our lecturer had guide us on how to do on the keyframe and show us the simple way to set the pose for the model here.
We will have 4 assignments for this semester, and the 4 assignments are:
1) Jumping
2) Walk Cycle
3) Walking point A to point B
4) Lip Sync
But before start doing on the jumping, our lecturer had guide us on how to do on the keyframe and show us the simple way to set the pose for the model here.
Before Jumping: Perspective View
Before jumping: Side View
Before jumping: Front view
Jumping: Perspective View
Jumping: Side View
Jumping: Front View
Landing: Perspective View
Landing: Side View
Landing: Front view
Finally, this is the whole jump for this exercise. Besides than showing the jump, I also add in some additional move in this animation.
Finally, this is the whole jump for this exercise. Besides than showing the jump, I also add in some additional move in this animation.
Subscribe to:
Comments (Atom)


